Prerequisites
- Install the .NET Core SDK. The .NET Core SDK includes the latest release of the .NET Core framework and runtime.
- Install Visual Studio Code for Mac.
- Install the Azure Command Line Interface (CLI)
Getting Started
In this tutorial, you’ll set up your Mac to do development using .NET Core and Azure. The tutorial also shows you the new and powerful .NET Core Command Line Interface (CLI) Tools.
After you have installed the .NET Core SDK and Visual Studio for Mac, open a terminal window and type the following:
$ cd /users/

$ cd users/yourusername/projects

$ mkdir samplereactapp

$ cd samplereactapp
The above commands will do the following: browse to the Mac user’s Projects directory and create a new directory to place the react app that we are about to create.
.NET Core CLI
.NET Core’s Command Line Interface (CLI) is very powerful, it allows you to do a lot without leaving the command line which allows for the fast and straightforward creation of these projects. Double-check your current directory is the new directory you’ve created, in our example this is samplecreateapp.
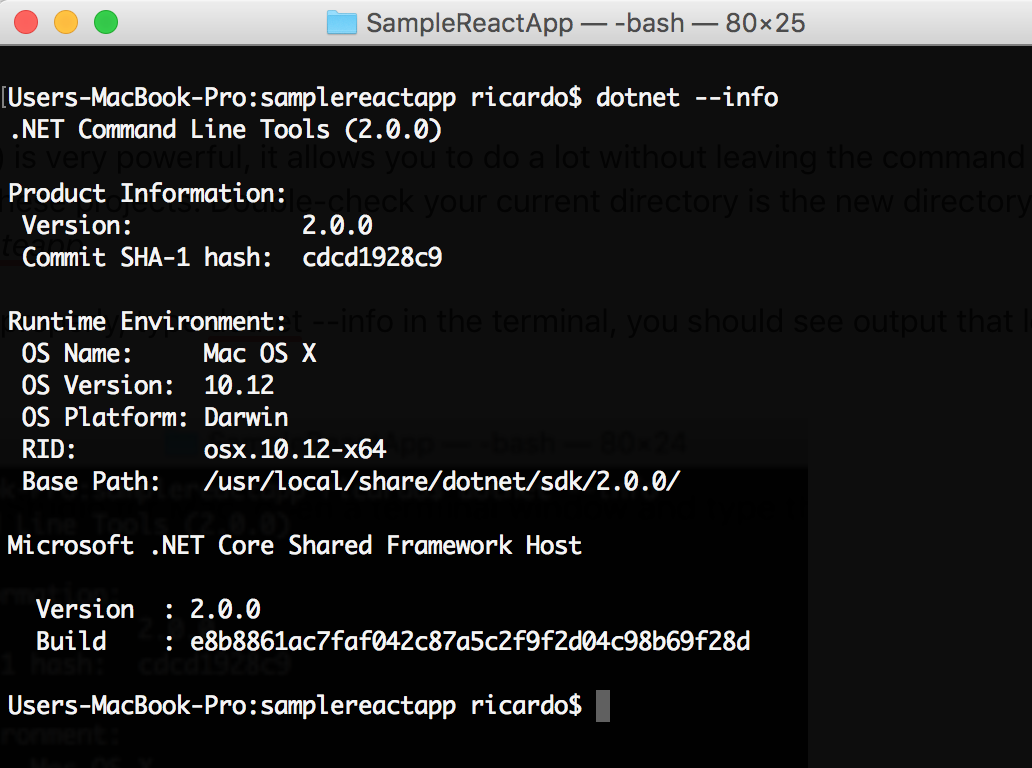
To make sure the .NET Core was correctly installed, type dotnet –info in the terminal, you should see output that looks like this:
Once you have confirmed that you have all the needed prerequisites, let’s continue to build the React web app.
Type dotnet new to see a list of available templates from .NET Core. You’ll have a list similar to this:
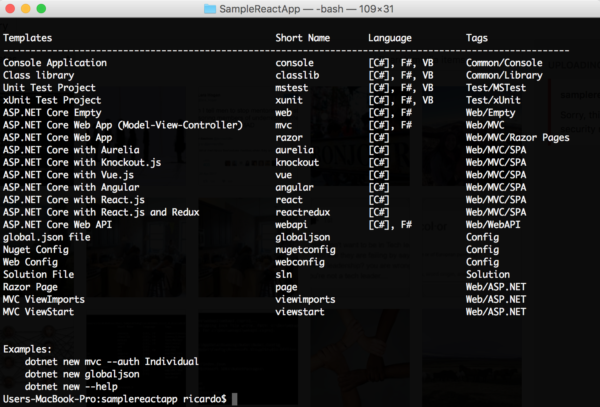
The command dotnet new lists all the .NET Core project templates that are available for you to use. For this example, we’ll use React so we’ll type the following command:
$ dotnet new react
The command above will create a new React web app inside the directory samplereactapp (or whatever you named it). Now, let’s execute npm install to restore NPM packages, this is needed before we are able to run the application. Restoring NPM packages might take a bit as it restored all NPM packages that are required.
$ npm install
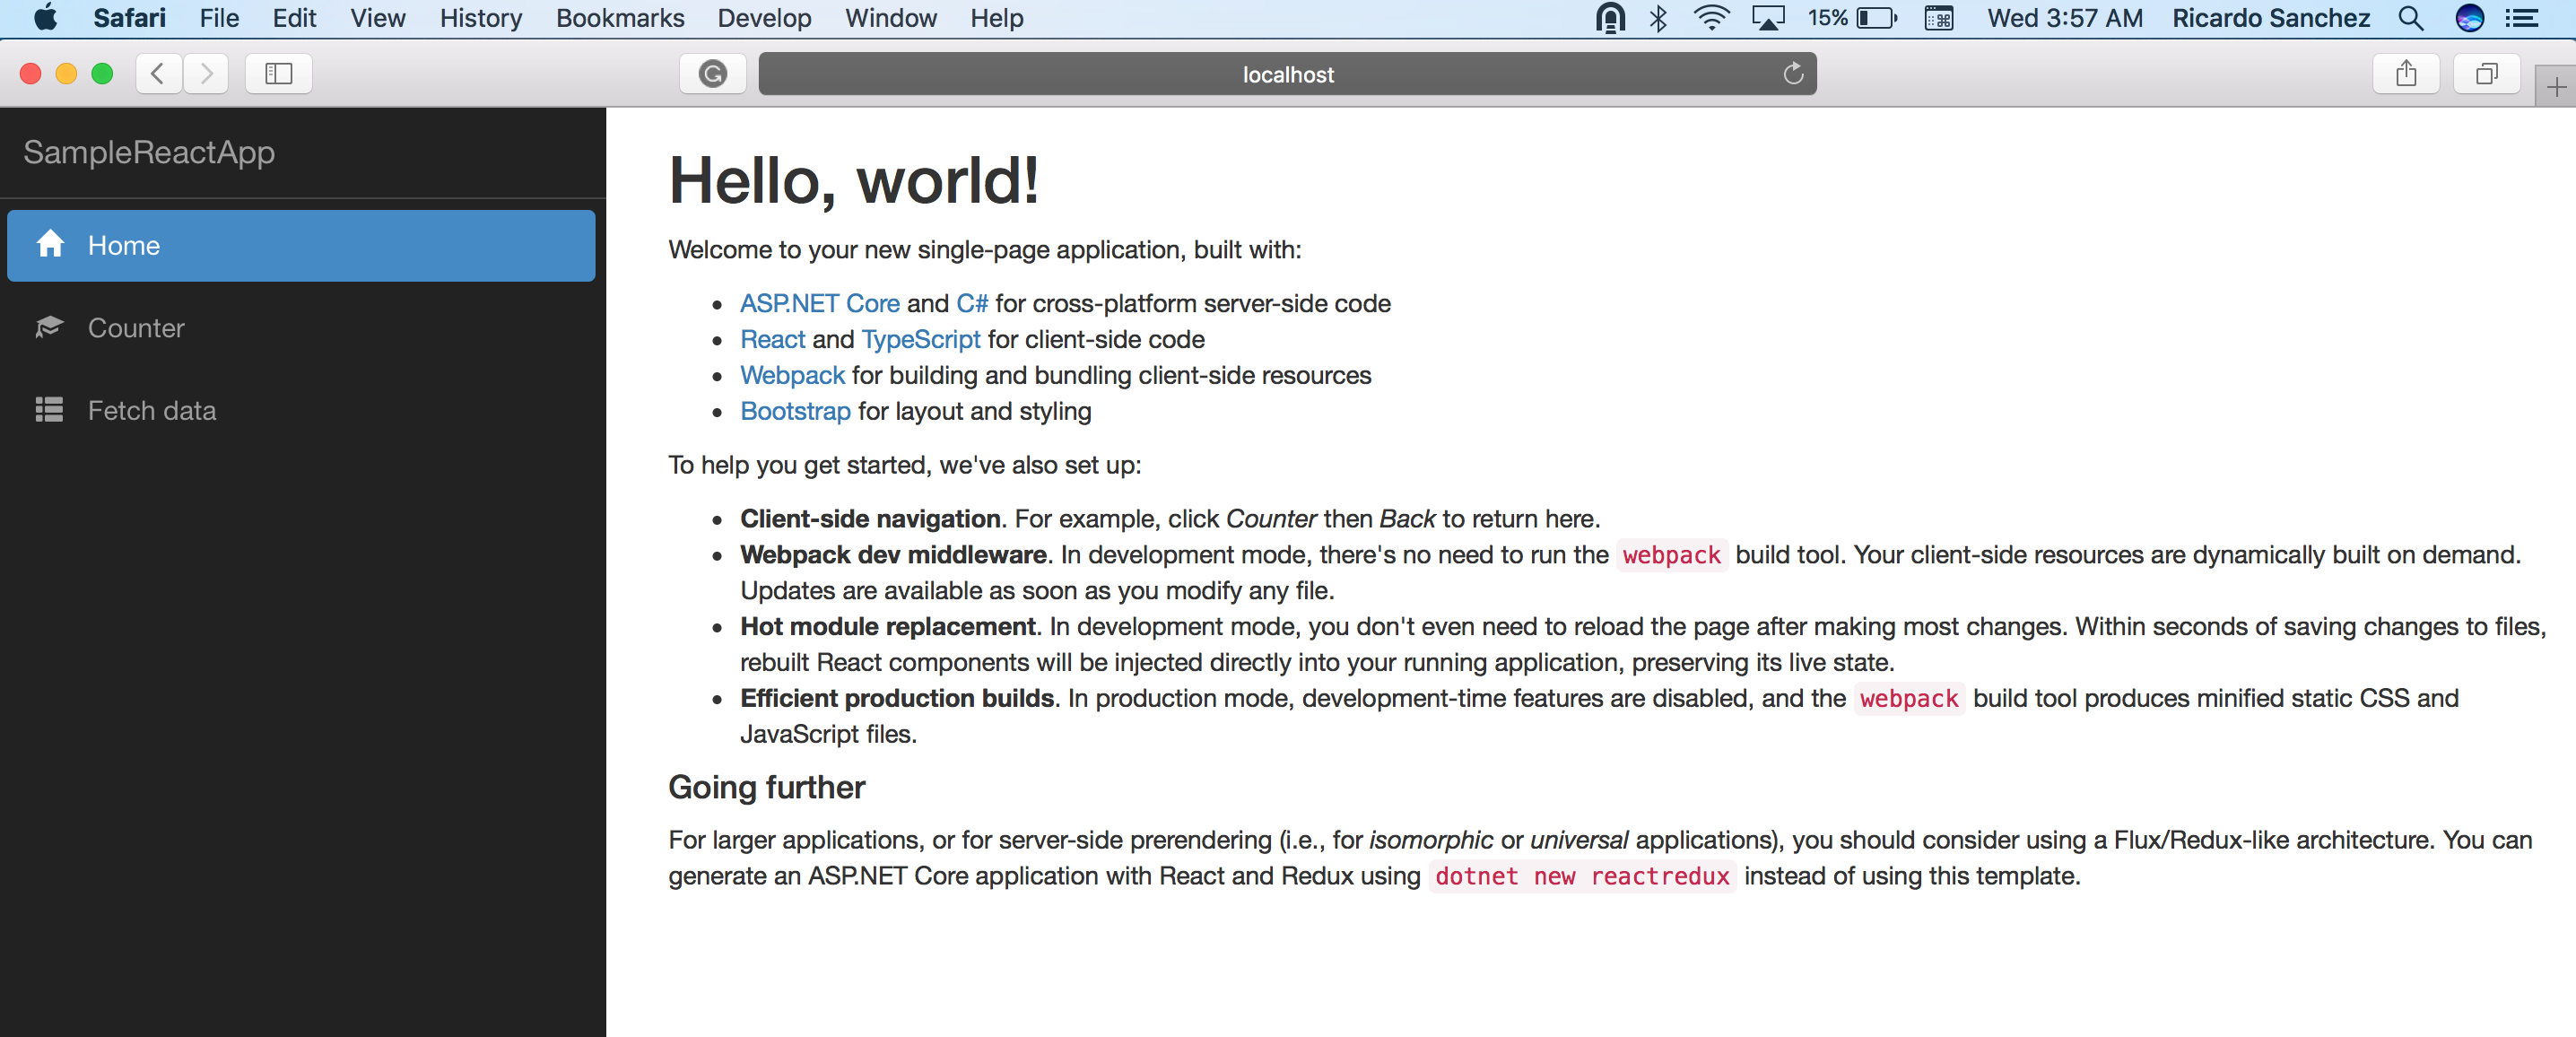
Now, once all the NPM packages have been restored, execute dotnet run to see this new React web app running in your browser.
$ dotnet run
That’s It! After you execute the dotnet run, you’ll see a message in the terminal window informing you the URL and port number you need to use in the browser to open the new React web app. In my case, it is http://localhost:5000.
Visual Studio Code
To open your new React web app in Visual Studio Code, just stop the running application by typing Ctrl+C, and then execute the following command to open the current directory in Visual Studio Code:
$ code .
Make sure you type the dot after the word code. This will open Visual Studio Code where you can start making changes to this React web app.
Once you are in Visual Studio, you can open a terminal window there with Ctrl+` to run any commands you need.
Deploying to Azure
Azure makes it really easy for you to create and deploy applications and other services to the cloud. If you don’t have an Azure account, you can create a free Azure account here.
Next, we’ll create an App Service in Azure to deploy our new React web app. To do this, we’ll use the Azure Command Line Interface (CLI), we can also use the Azure portal to do this, but I want to show you how to do this without having to open your browser and instead using a command line because it’s cool!
Before we start, let’s make sure you have the Azure CLI installed, execute the following command on your terminal:
$ az
If you have Azure CLI you’ll see a list of available commands; otherwise, you’ll see an error. If Azure CLI is not installed yet, please use this link and install it before continuing any further.
Setup local git repository
Make sure you are in the directory of your newly created app and then execute the following:
$ git init

$ git add -A .

$ git commit -m "Initial commit"
Login to Azure and create the resources needed to deploy your application
$ az login
After login in successfully, you’ll receive a response from Azure with your account information.
$ az group create --name myResourceGroup --location "West US"
The command above creates a resource group named myResourceGroup in the West US location. To see all supported locations for App Service Plans, execute the following command:
$ az appservice list-locations
Next, let’s create an Azure Service Plan. An App Service Plan specifies the location, size, and other features of the web server farm that hosts your app. The following command creates an App Service Plan under the Resource Group you just created in the Free pricing tier:
$ az appservice plan create --name myAppServicePlan --resource-group myResourceGroup --sku FREE
After you execute the command above, Azure will send a JSON response with all the details about this new App Service Plan.
Finally, let’s create a web app in Azure which provides a hosting space for your new React web app and provides a URL to view the deployed app.
$ az webapp create --name yourAppName --resource-group myResourceGroup --plan myAppServicePlan --deployment-local-git
The above command created a new web app to host your newly created React web app, under the new resource group and app service plan. Also, it configures this app with local git so you can deploy directly from your computer to Azure using git.
You’ve got an empty web app, so let’s push the code for the React web app to Azure now. Look at the Azure response from the last command, and find the deploymentLocalGitUrl property with this format:
"https://@.scm.azurewebsites.net/.git"
Once you find this URL in the last Azure response, execute the following command to push your code to Azure:
$ git remote add azure

$ git push azure master
The command above will display information similar to the following example:
Counting objects: 40, done.

Delta compression using up to 8 threads.

Compressing objects: 100% (36/36), done.

Writing objects: 100% (40/40), 56.76 KiB | 5.68 MiB/s, done.

Total 40 (delta 1), reused 0 (delta 0)

remote: Updating branch 'master'.

remote: Updating submodules.

remote: Preparing deployment for commit id '752069d9de'.

remote: Generating deployment script.

remote: Project file path: .SampleReactApp.csproj

remote: Generated deployment script files

remote: Running deployment command...

remote: Handling ASP.NET Core Web Application deployment.
Once the deployment is done, open your browser and go to the deployed application:
http://.azurewebsites.net
Next Steps
You can now make any changes, and then commit and push your changes to Azure using git. Also, you might want to login to the Azure portal to manage the web app you created.
If you want to learn more about .NET, .NET Core, Azure, etc., I recommend that you visit https://dot.net.
Happy Coding!
Thanks for reading! 🙂 If you enjoyed this article, hit that share button below ❤ Would mean a lot to me and it helps other people see this post.