Killer features and a beautiful design are important things when developing a website. However, none of that matters if your site doesn’t perform well or is not able to scale when necessary. Serving static files such as CSS and images from your web server is not ideal.
These are some of the disadvantages of serving static files directly from your web server:
- Unnecessary deployment of files that do not change often, potentially slowing the deployment process.
- Increase the load of your web server, making it less responsive.
- Increase of hosting costs
- Etc…
Here are some of the advantages of not serving static content from your web server:
- Distribute web server load.
- Save bandwidth.
- Boost performance and reduce your existing hosting costs.
- Ability to update static files by replacing them in CDN without having to deploy entire website.
- Etc…
In this blog post I will show you how to take advantage of Microsoft’s Azure CDN and Blob storage to make your website serve all of its static content from the Azure CDN. If you don’t have an Azure account and you are a web developer you are missing out. Azure supports a wide range of frameworks and technologies including but not limited to Python, MySQL, Oracle, Java, Linux, PHP, Ruby and of course all of Microsoft products such as .NET, MS SQL, etc… Also, they offer a program for startups called BizSpark where you get Azure services for free, you can sign up here if you like.
Create a Blob storage account and a container
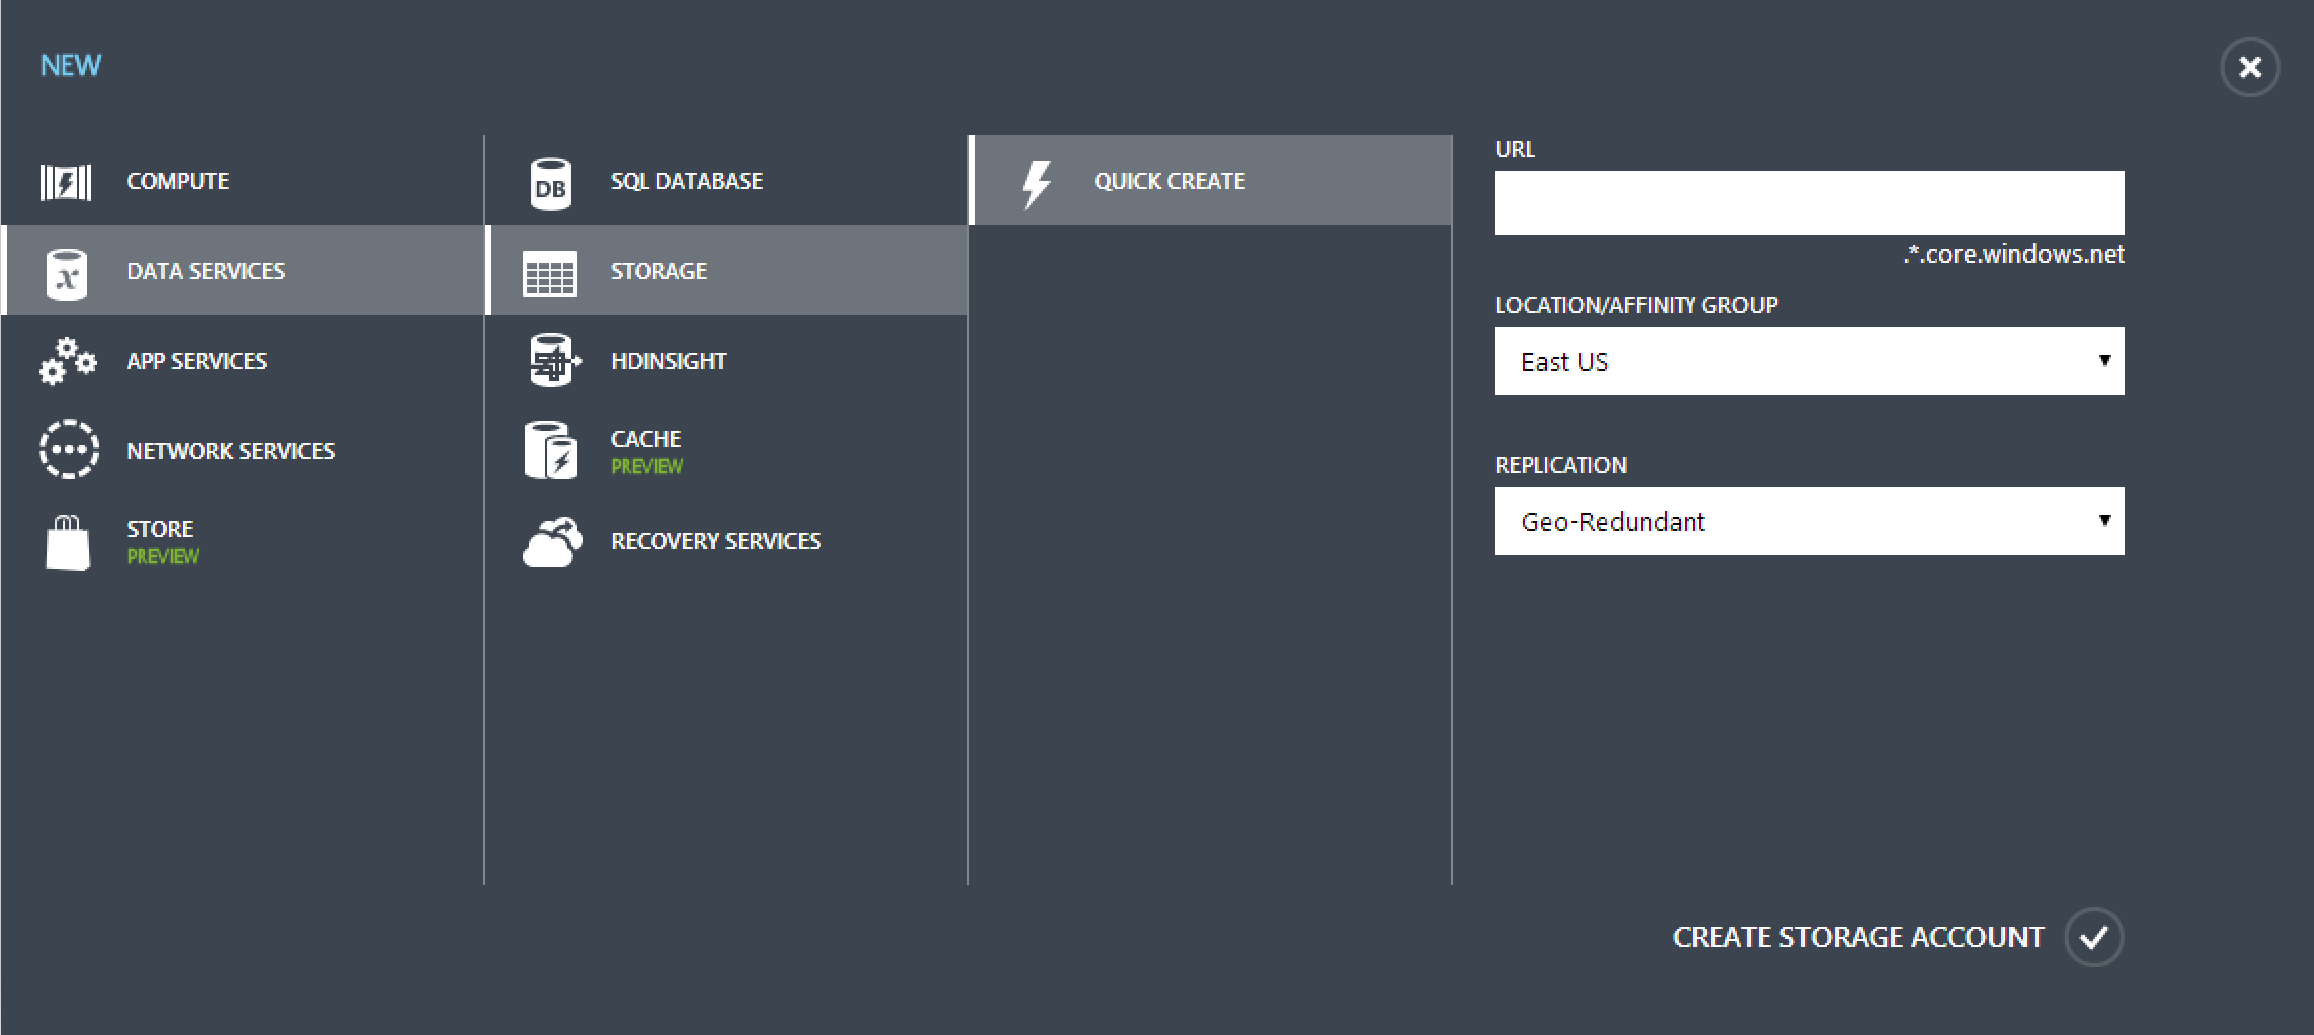
First of all you need to create a blob storage account and then a container which you’ll use to store all of the static content. To do this open your Azure portal and then click on the + NEW button located at the bottom left corner of the portal and select Data Services > Storage > Quick Create > as shown below, then just type a URL to identify this new blob storage account. In this example I used the name “mystaticfiles”.
It takes approximately 1 minute for the blob storage account to be created. Think about it, it takes a minute (or less) to deploy a blob storage account/instance capable of logging, monitoring and redundancy.
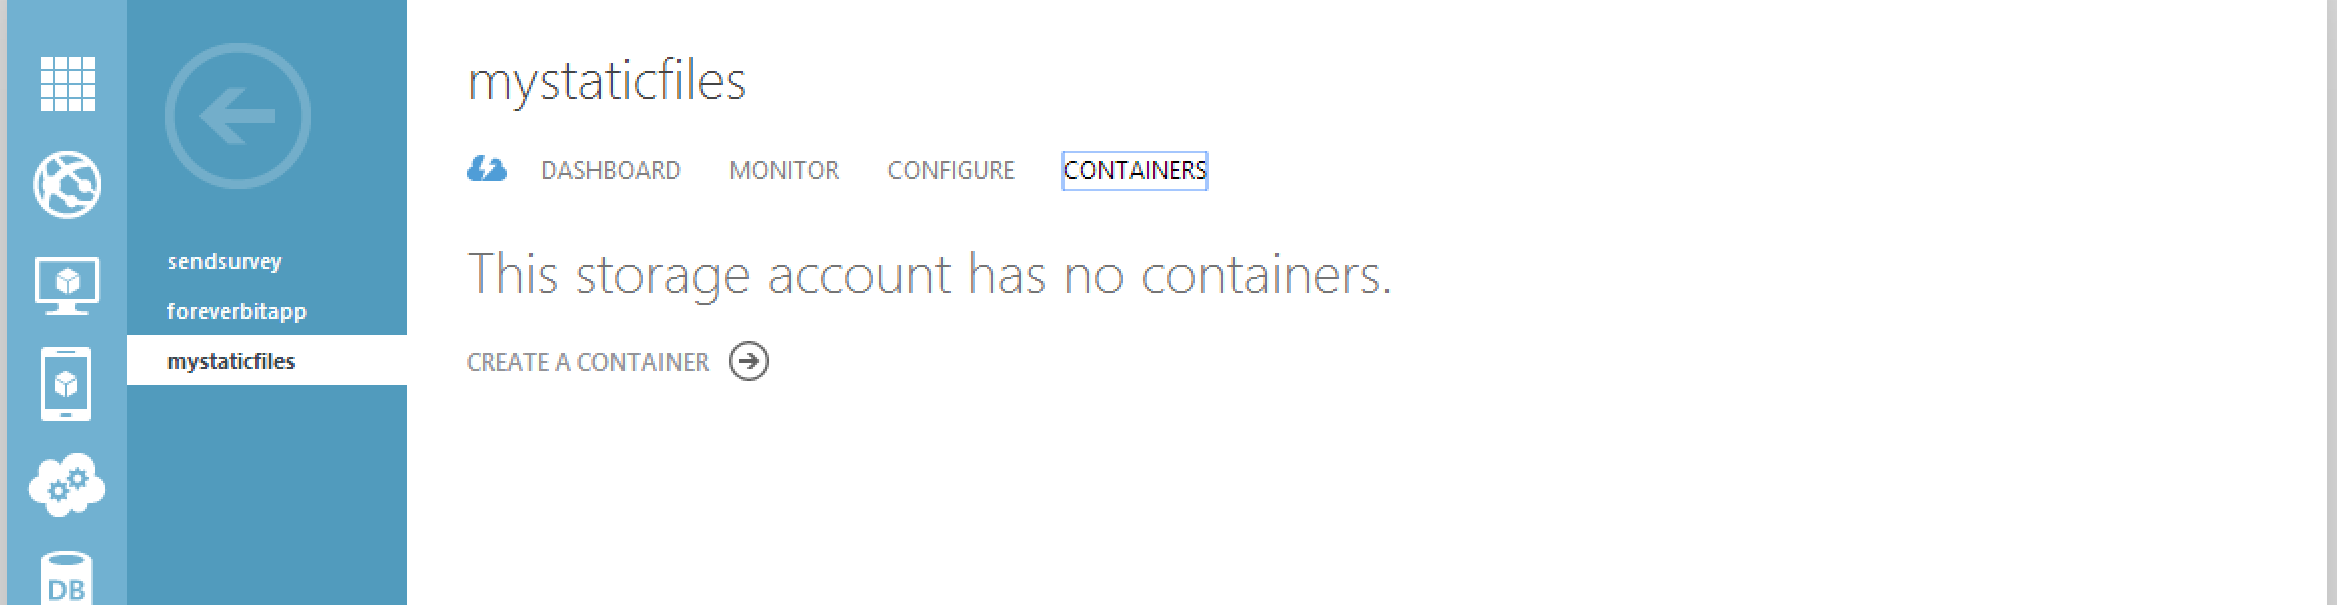
After that you’ll see your newly created storage account, click on the name of it, then on the Containers link and then on Create Container as shown below:
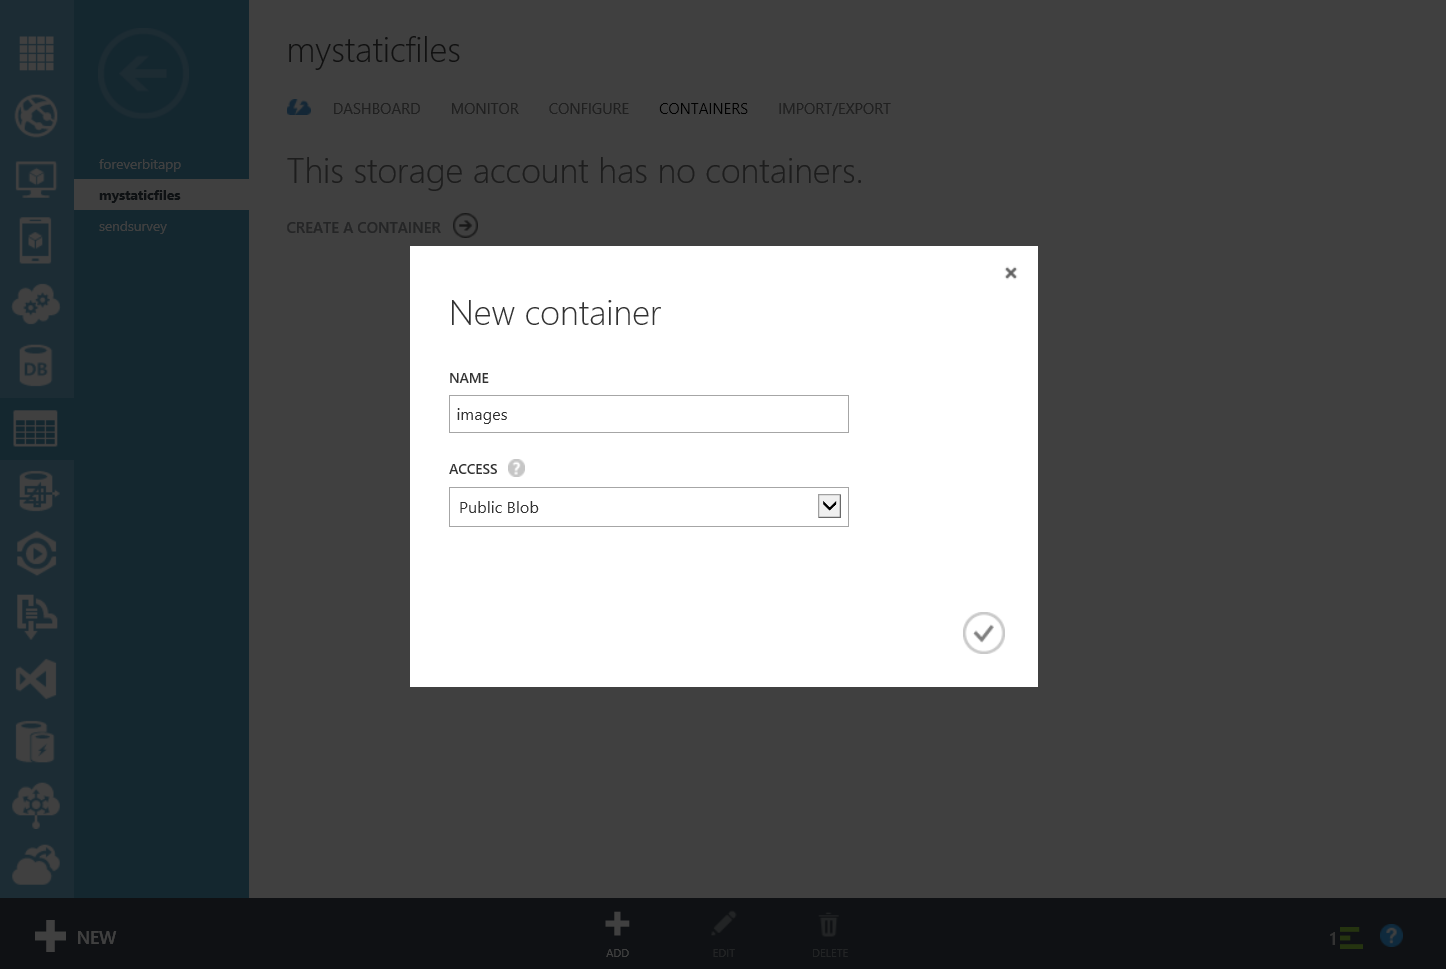
After the Create Container window opens, type the name of the new container and its access type. For this example we are going to select Public Blob which allow us to have a container where all files are available to the public. The other two options are Private which makes the container available to you only and Public Container which allows anyone to have access to the files, metadata and pretty much everything else in this container.
Manage the blob storage account and container
Now that you have your new storage account and container, you can start transferring static files from your website to the container(s) you’ve created. To do this, you can either write a service that does this for you or use one of the programs available that help you manage your containers and files in an Azure storage account.
I found an open source application to help me manage my storage accounts and containers and so far it has worked out very well for me. If you are interested, you can download it here and even get the source code for it too:
You can use this application to browse your files as well. Once you have all your static files in your Azure blob storage containers you can then update your static file’s path to point to the Azure containers. For example, here is a link to one of my images stored in Azure blob storage:
https://foreverbitapp.blob.core.windows.net/images/journal9_medium.jpg
Are you using Azure blob storage? please share any tips or feedback in the comments below.