How to use Azure Storage to host a static website

Have you ever tried to use one of the many cloud providers out there to host and serve a simple static website? I have, and while there are places that make it somewhat simple to accomplish this, as a developer using Azure, I’m delighted to learn that this feature (preview) is now available to all developers out there.
Over the years I’ve needed to deploy a simple website to the cloud many times, but just a few days ago as I was getting a page ready for my new project, I found that this is now possible using Azure Storage. This feature is in public preview, but I’m trying it as it is precisely what I needed to host my temporary landing page while I continue to work on the rest of the website.
I’m assuming you already have an Azure account, but in case you don’t, follow this link to sign up for up to twelve months of free Azure services! Yep, this is real.
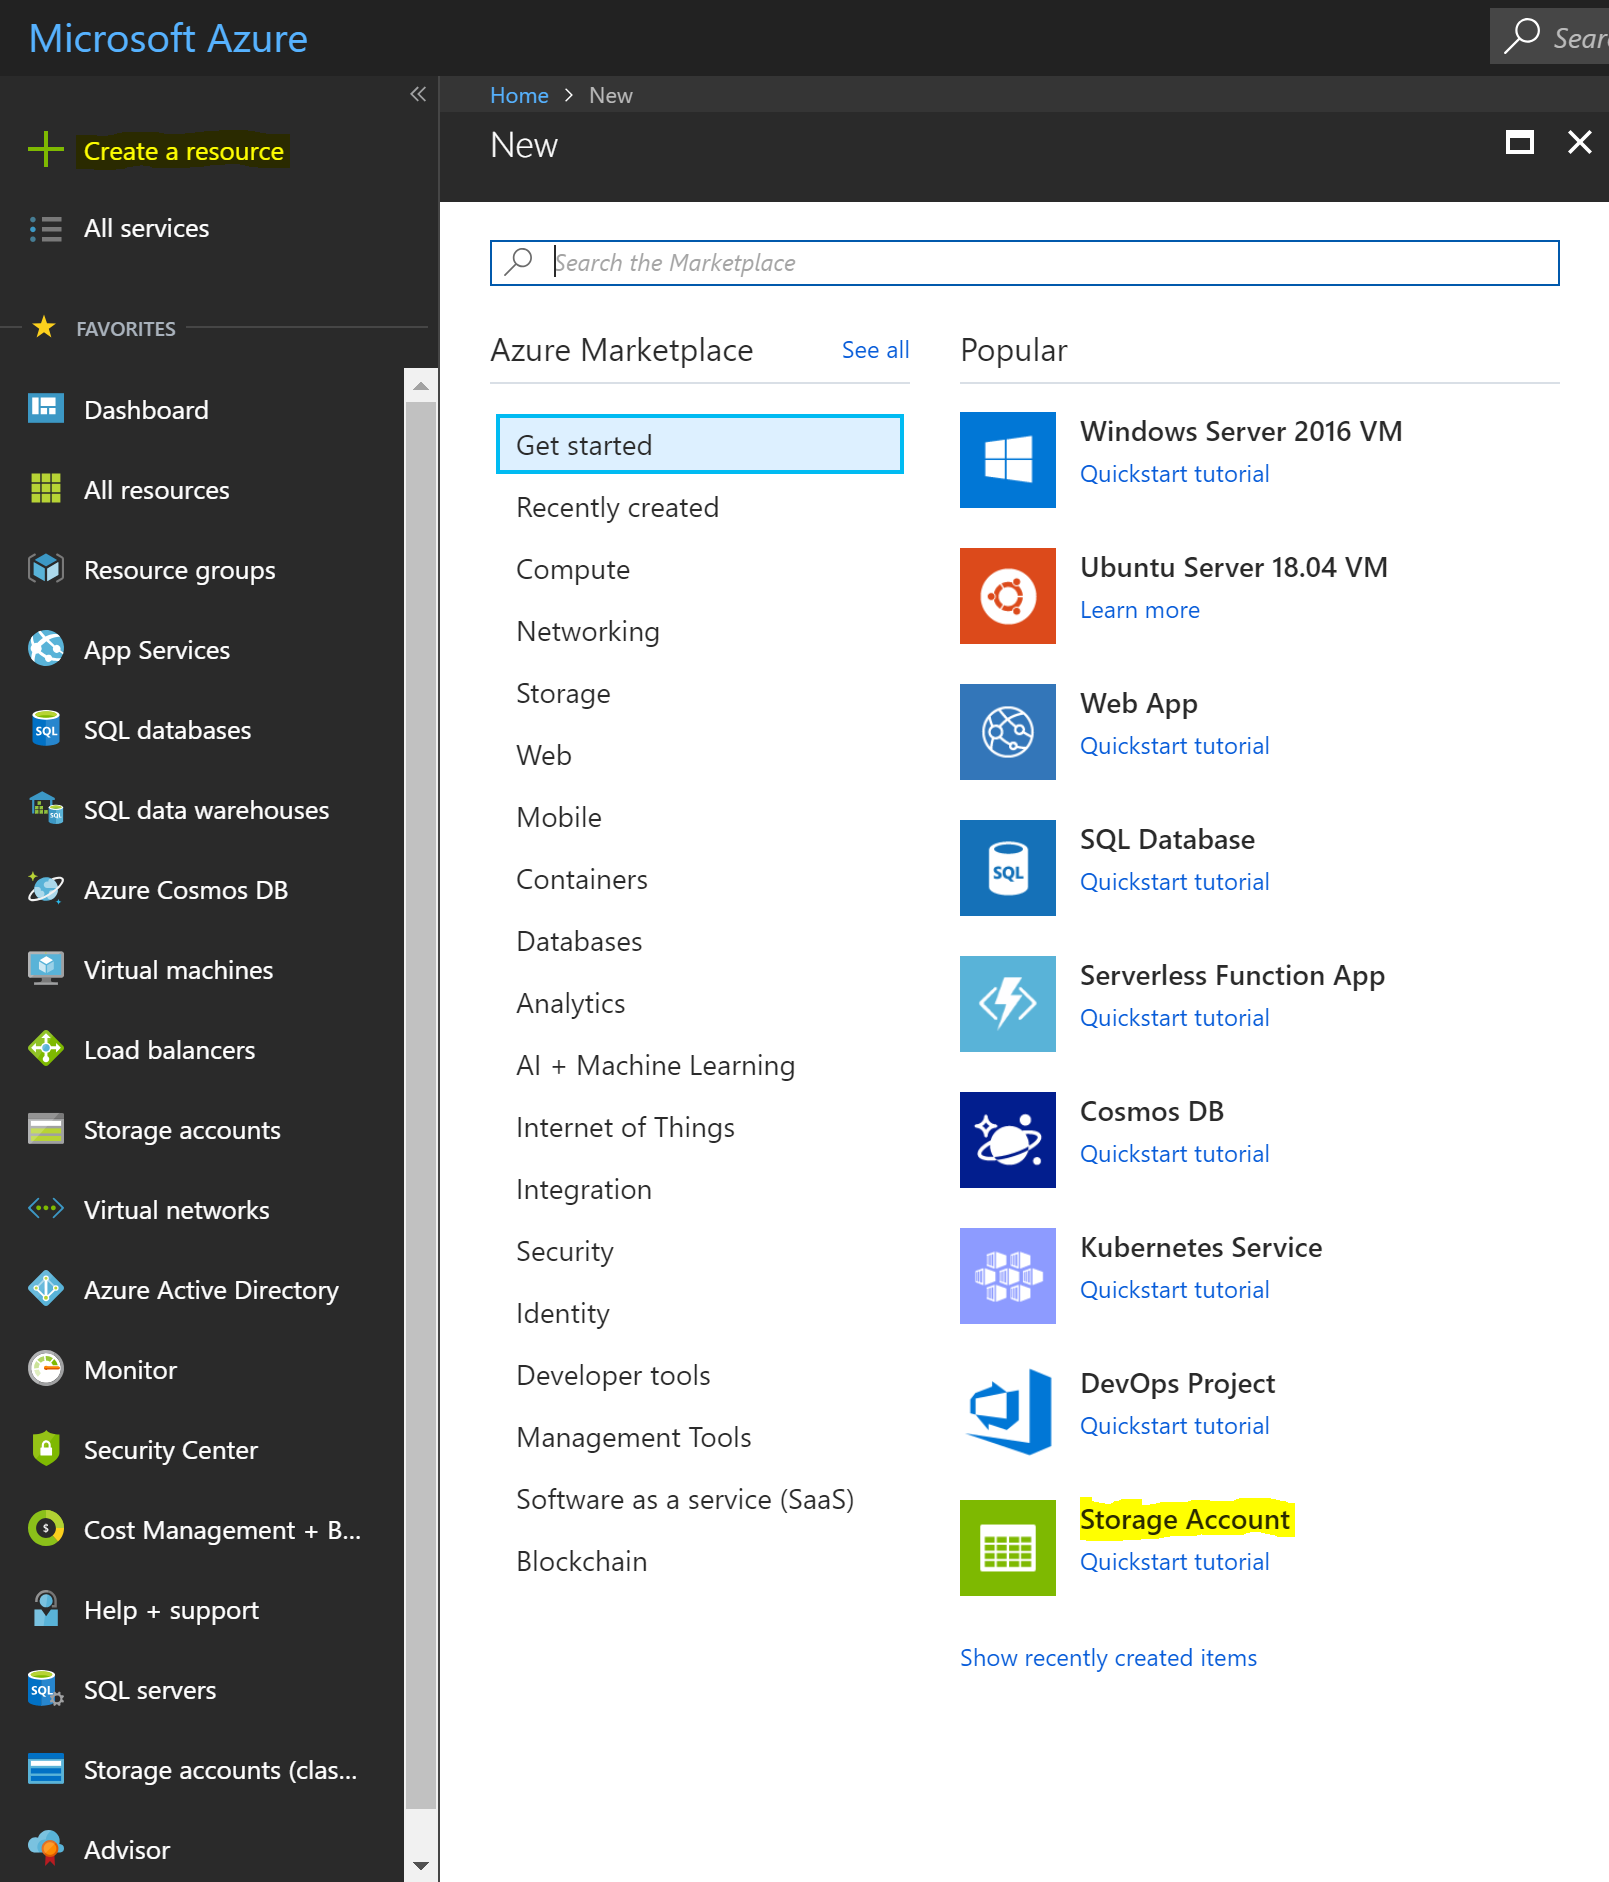
The first step is to create a new Storage Account, once you log in to Azure, click on Create a resource and then select Storage Account as shown below.
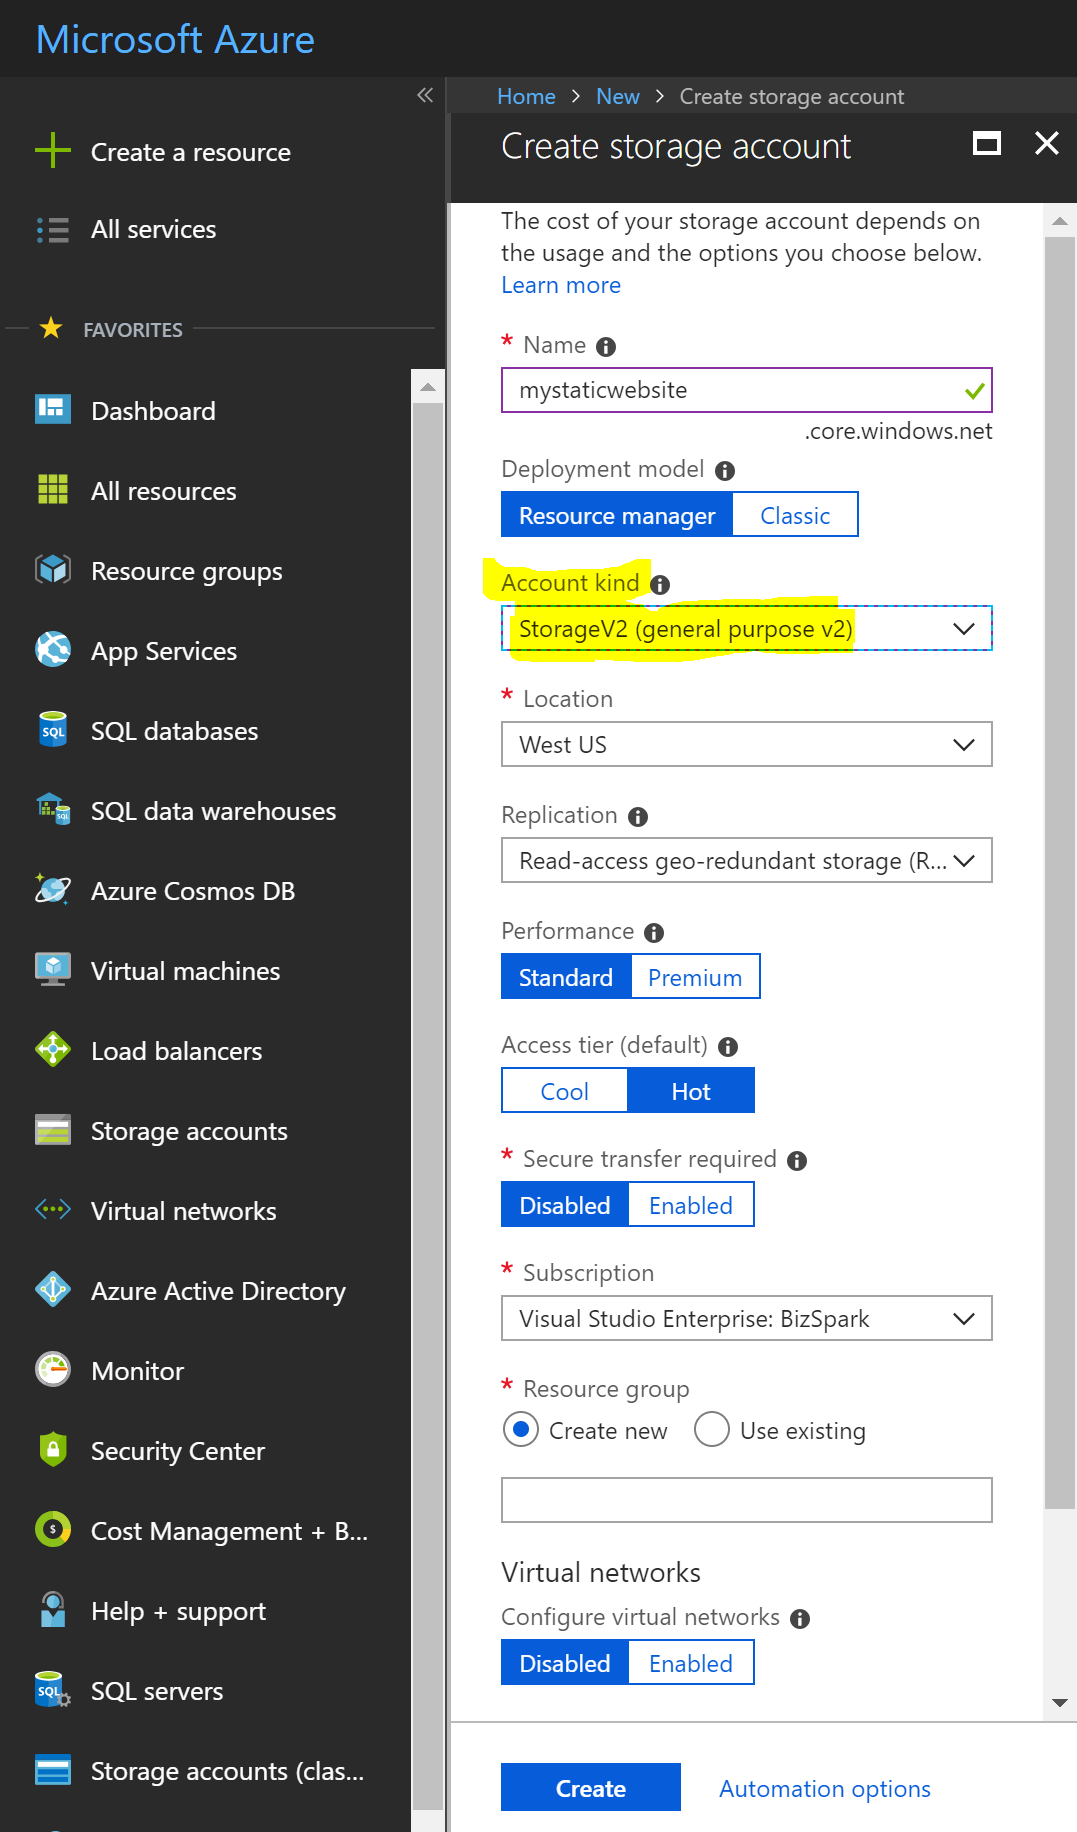
In the Create storage account window, make sure to select General-purpose v2 (GPv2) under Account kind. The static website (preview) is only available under this kind of account. General-purpose v2 (GPv2) accounts are storage accounts that support all of the latest features for blobs, files, queues, and tables. Follow this link for more details about this kind of storage accounts.
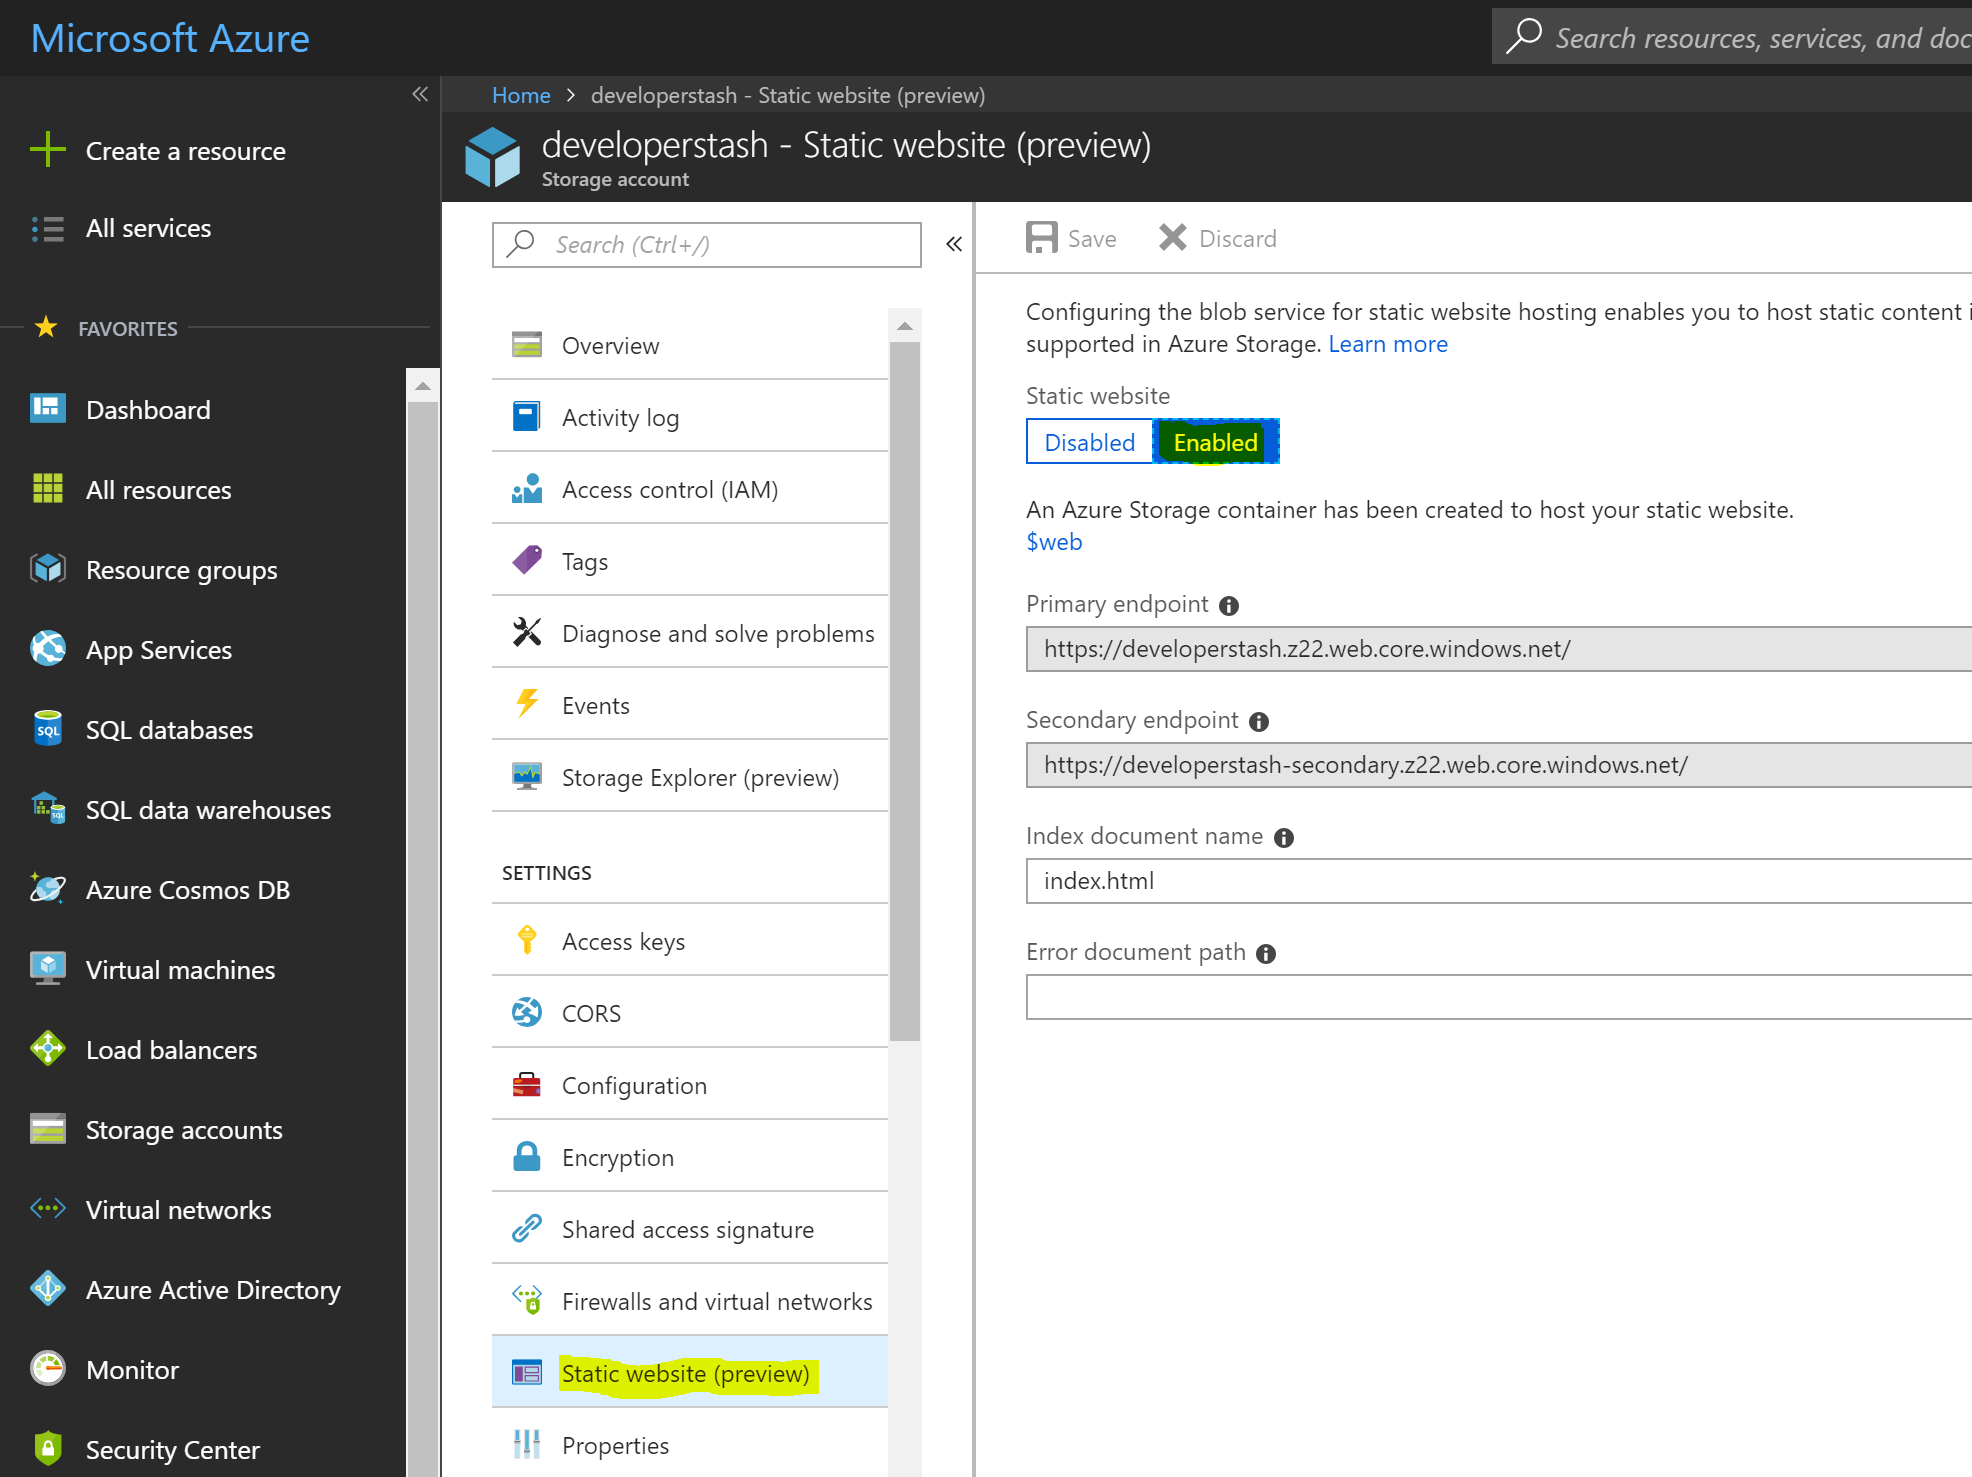
After you create the new storage account, it takes approximately 2 minutes or so for this resource to be ready. The last step to configure Azure to host a static website is to enable this feature in your newly created Azure storage account. To do this, click on the storage account, then on Static website (preview) and finally click on the button labeled Enable to enable this feature. Once you do this, you’ll see a new storage container with the name $web.
The last step is to deploy your static website to your Azure storage account. You can do it in many ways, but below are my two favorite ones:
- Upload your files directly from the Azure storage account page. To do this, you’ll have to click on the autogenerated container ($web) and then choose the option to upload.
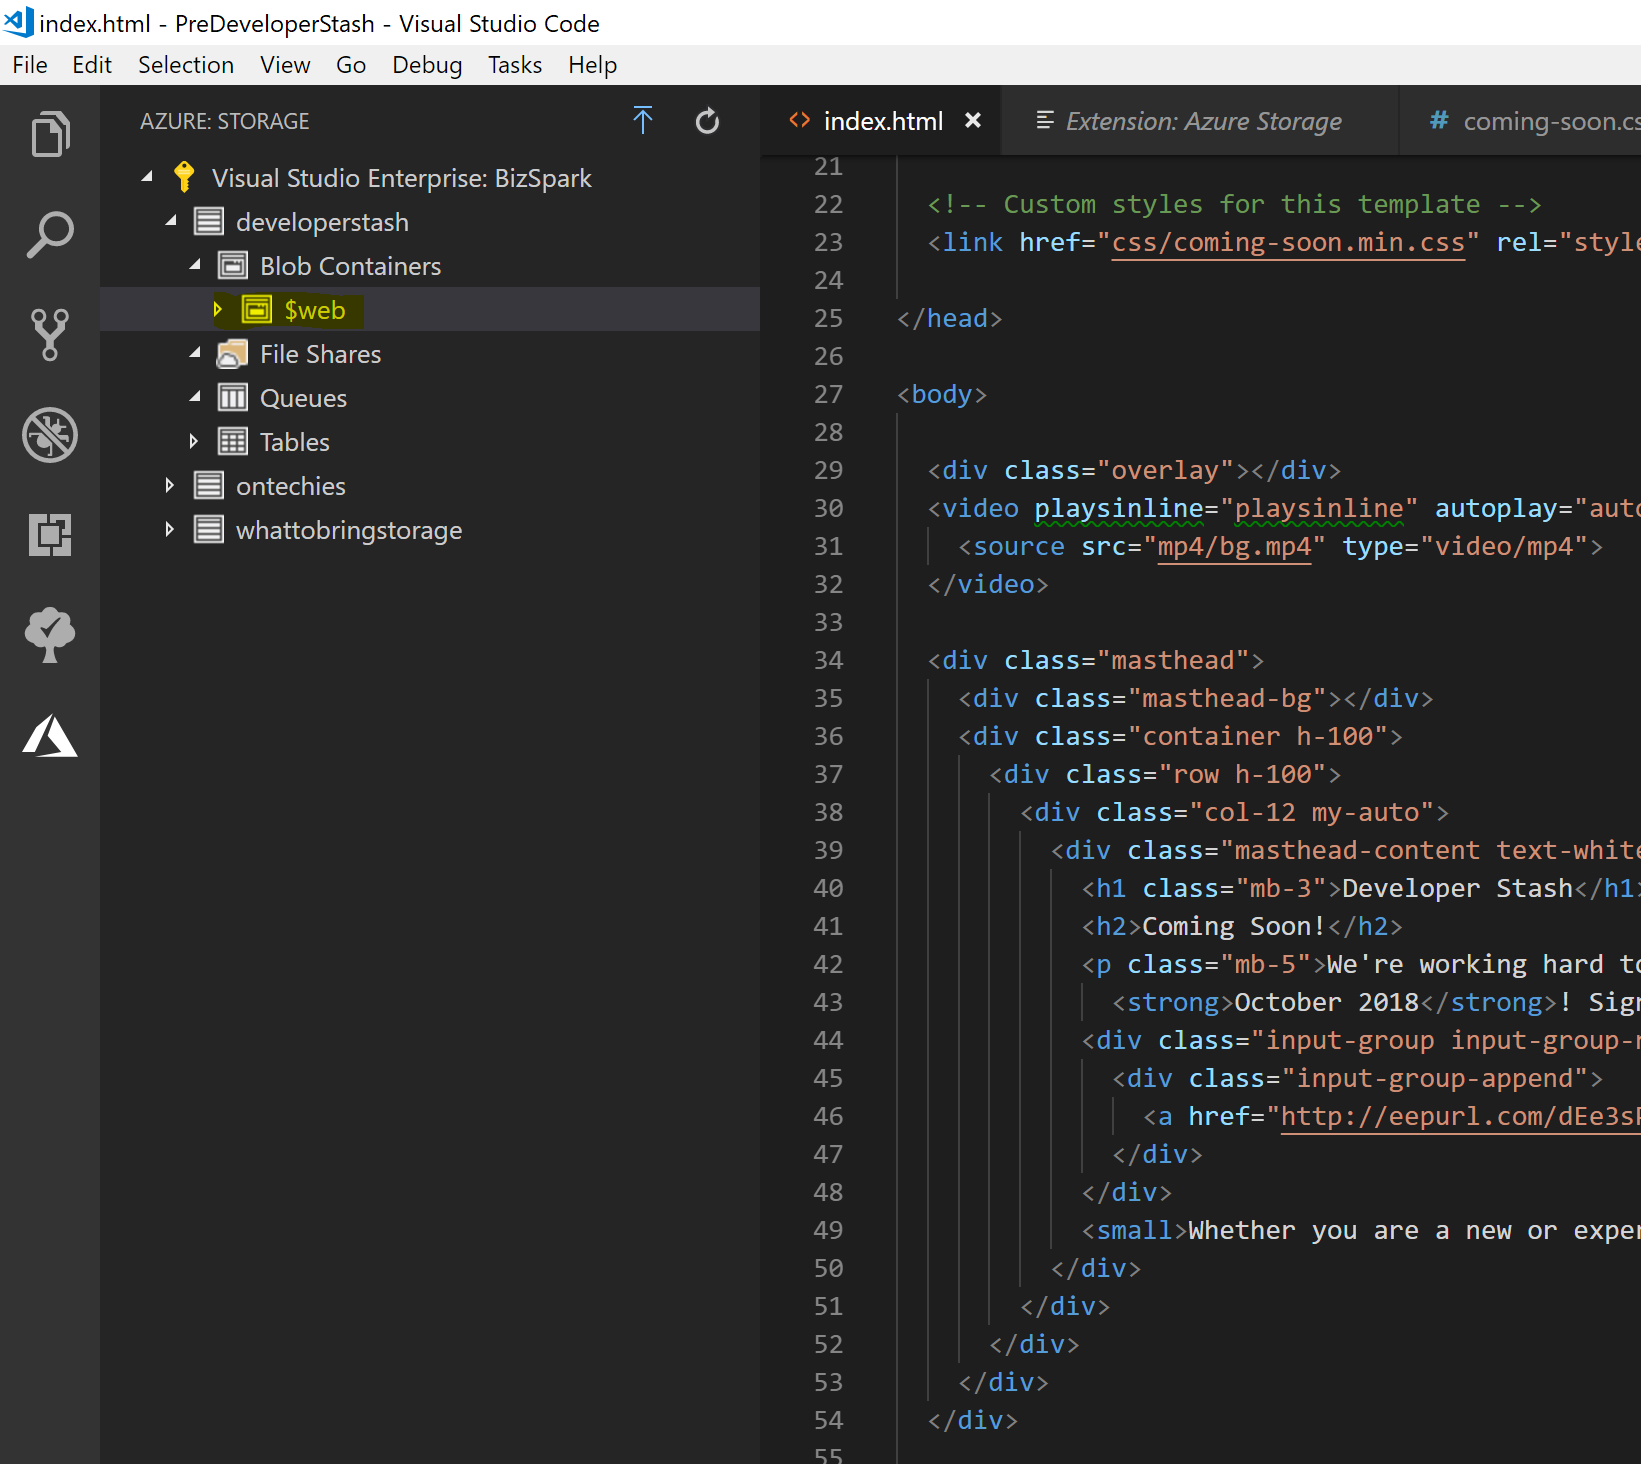
- Use VS Code and the Azure Storage for Visual Studio Code extension. This extension allows you to connect to your Azure storage account and view, create, and upload any files to it. By the way, I wrote a post the other day with a list of my favorite VS Code extensions, go take a look. Once you install this extension, click on the new Azure icon added to the menu bar on the left side and then expand your storage account, select the $web directory, and choose to Deploy to Static Website.
How to add a custom domain to your Azure storage account
When you create a new Azure storage account, a URL is given to it for you to access. However, you might want to add a new or existing custom domain name to it.
Go back to the properties of your Azure storage account and select Custom domain under the Blob Service section. Once you are there, follow the instructions given to you which involve adding a CNAME record with your DNS provider and map it to a URL that you’ll find in those instructions.
Simple right? It took me about an hour to create a simple landing page using an HTML bootstrap template and the Azure storage account. I already had the domain name developerstash.com which is a new project I’m working on where I’ll be sharing hand-picked resources and tools that have been very useful on my career as a software engineer. My goal with Developer Stash is for it to become a resource for everyone, no matter the level of experience or your background. I’m sure you’ll find something useful for your work, your projects, and anything that you might be doing that includes the programming and the design of web applications and mobile apps. If you are interested, please leave your email here.
Happy coding!